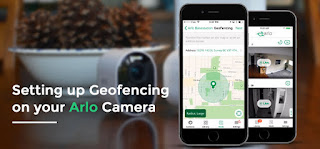
Setting up Geofencing on your Arlo Camera
Geofencing is a virtual fencing technique leveraged by Arlo cameras to learn about the location or as Arlo terms it, Zone. You can control the Arlo camera to arm, disarm or resume schedule modes when your mobile device is in the zone or out of it. To set up geofencing you can use your smartphone and allow the Arlo App to use the location data. If you are looking to enable the same, you’ll need to log in to the Arlo login page using the my.arlo.com web page or the myArlo app. This blog will walk you through steps you can follow once you are logged in.
How accurate is geofencing?
The geofencing feature on your Arlo camera uses GPS, cellular data, and WiFi data to keep a track of devices and notify your accordingly. To improve the accuracy of the same, make sure that your smartphone has its WiFi, GPS, and location services enabled, so it can record data and use it to perform.
In areas where there is less interference from the nearby towers and wireless devices, the accuracy will increase. Therefore, if you are looking to get accurate results, make sure you turn off the wireless devices that are not in use.
Preparing your smartphone
● Enable the GPS/Location Services on your smartphone so Arlo can locate it easily.
● Also, enable the WiFi and connect your smartphone to the home wireless network.
● Download the Arlo app and log in on all the devices that you intend to enable geofencing on.
● Furthermore, make sure the following settings are as prescribed:
Location Access Permission: On
Battery Saver: Off
Data Limit: Off
Flight/Airplane Mode: Off
Enabling Geofencing
● Launch the Arlo app on your smartphone.
● Tap on the Mode button and select the camera or the name of the base station from the screen.
● You’ll see a list of modes appear on the screen.
● Here, select Geofencing and you’ll be asked to allow the location access. Tap on the Allow button once prompted. The app will now locate your address and display the same on the screen.
● Set the radius settings to your preference by tapping on the radius button. A new window will appear. Select the radius size from the given options and then tap on the Next button.
● Tap on the Device Location button and specify a name for the location you are in.
● Now, tap on the Away Mode and select a mode from the given options viz. Armed, Schedule, and Custom. The camera will use this mode when your smartphone is outside the geofence zone.
● Next, tap on the Home Mode button and select a mode again. This mode will be used when the smartphone is within the radius of the geofencing zone.
● If you have two or more devices configured to work with the Geofencing feature, you’ll need to specify which device you would like to keep primary. To do that, select the preferred mobile device and tap on the Next button.
● Tap on the Save button now.
The Geofencing feature on your Arlocamera is now set up and you will begin receiving notifications for events on your smartphone.


Comments
Post a Comment